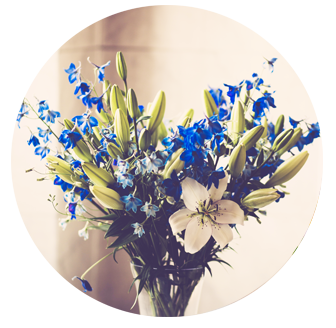
Preserve Your Blossoms with These 3 Effortless Techniques
Posted on 30/06/2025
Preserve Your Blossoms with These 3 Effortless Techniques
Flowers have a remarkable charm, and they have been used for centuries to express emotions, commemorate important events, and decorate our living spaces. But unfortunately, their beauty is often fleeting. Preserving your blossoms allows you to cherish the memories attached to each petal and bring their delicate allure into your home for much longer. Whether you've received a bouquet for a special occasion, grown gorgeous blooms in your garden, or stumbled upon wildflowers on a walk, learning to keep your flowers fresh and vibrant is an invaluable skill.
Below, we explore three effortless flower preservation techniques that anyone can do at home. Each method offers unique features and results, ensuring you can pick the best way to immortalize your special blossoms. By the end of this article, you'll know exactly how to preserve your blooms for arrangements, crafts, or keepsakes with minimal effort.

Why Should You Preserve Your Blossoms?
- Create Lasting Memories: Flowers from weddings, birthdays, or anniversaries hold sentimental value. Preserving them extends their story.
- Crafting Opportunities: Dried or pressed flowers are perfect for artwork, handmade cards, bookmarks, and even jewelry.
- Decorating: Everlasting blooms add a touch of nature to your home all year round and can complement nearly any decor style.
- Sustainability: Giving flowers a second life reduces waste and ensures you make the most of nature's fleeting gifts.
With so many benefits to flower preservation, it's easy to see why these techniques are so popular. Let's delve into the top three easy ways to preserve your blossoms and keep their beauty well beyond their natural prime.
1. Air Drying: The Classic and Hassle-Free Preservation Method
- Best for: Roses, lavender, hydrangeas, baby's breath, and many wildflowers
- Time Required: 1-3 weeks (depending on humidity and flower type)
- Skill Level: Beginner
Overview of Air Drying
Air drying is the most traditional and accessible method to preserve your blooms. By hanging your flowers upside down in a dry, well-ventilated area, the moisture naturally evaporates, leaving you with crisp, beautiful flowers that retain much of their original color and shape.
Step-by-Step Guide to Air Drying Flowers
- Choose and Prepare Your Blossoms: Select flowers that are just beginning to bloom for the best results. Remove excess leaves and cut stems to your preferred length.
- Bundle: Tie stems together in small bunches using string or a rubber band. Avoid overly large bundles to prevent mold and uneven drying.
- Hang Upside Down: Suspend the bundles upside down in a dark, dry, and well-ventilated room (such as a closet, attic, or unused room). Direct sunlight can fade colors.
- Wait Patiently: The drying process typically takes one to three weeks. Check periodically for complete dryness, especially at the thickest part of the stem.
- Display or Store: Once dry, use your preserved blossoms in bouquets, vases, wreaths, or crafts. For storage, keep them wrapped in paper in a cool, dry place.
Tips for Air Drying Success
- Humidity is not your friend: Excess moisture can cause mold or mildew, so always choose a dry environment.
- Handle with care: Dried flowers are delicate and can break easily. Mist lightly with hairspray for extra durability.
2. Pressing: Flattening Flowers for Artful Keepsakes
- Best for: Daisies, pansies, violets, ferns, and other delicate or flat blooms
- Time Required: 1-2 weeks
- Skill Level: Beginner to Intermediate
Why Should You Press Flowers?
Pressing flowers is a longstanding tradition used to create beautiful, two-dimensional floral art. This method is ideal for those planning to use their preserved blossoms in albums, greeting cards, resin crafts, bookmarks, or wall art.
How to Press Flowers: A Simple Technique
- Prep the Blossoms: Choose fresh, unbruised flowers. Gently blot away moisture with a tissue or paper towel.
- Arrange Between Paper: Place flowers between two sheets of absorbent paper (parchment, blotting, or coffee filters).
- Press with Weight: Stack heavy books or use a dedicated flower press. Make sure pressure is applied evenly.
- Allow to Dry: Keep the stack in a dry, undisturbed area for 1-2 weeks. Change the paper every few days if you notice excess moisture.
- Reveal Your Artwork: Once completely dried and flat, carefully remove your pressed blossoms. They're ready for display or crafting!
Creative Uses for Pressed Flowers
- Frame Your Favorites: Arrange pressed flowers in glass frames for gorgeous, ever-lasting wall art.
- Personalize Cards: Attach pressed petals and leaves to homemade greeting cards for a thoughtful touch.
- DIY Bookmarks: Laminate pressed blooms to make charming bookmarks or tags.
- Decorate Tech: Slip small pressed flowers into clear phone cases for custom botanical designs.
Pressed flowers are lightweight and easy to store, making them a perfect choice for memory books or scrapbooks. The colors may fade slightly over time, but pressed blossoms retain their shape and visual appeal for years when stored properly.
3. Silica Gel Drying: Preserving Blossoms for Maximum Color & Shape
- Best for: Roses, peonies, carnations, dahlias, zinnias, or any blooms with thick petals
- Time Required: 2-7 days
- Skill Level: Intermediate
What Is Silica Gel Drying?
For a method that delivers the most vivid color and three-dimensional shape, silica gel is the top choice. Silica gel consists of tiny, moisture-absorbing crystals that gently and quickly draw water from flowers without flattening them. The result is preserved flowers that look strikingly similar to their fresh counterparts.
The Step-by-Step Silica Gel Flower Preservation Method
- Prepare the Container: Choose an airtight container large enough for your blossoms and silica gel. Plastic food storage boxes work well.
- Add Silica Gel Base: Pour a layer (about 1-2 inches) of silica gel into the container.
- Arrange Flowers: Gently nestle the flower heads into the gel, keeping blooms upright and ensuring they do not touch each other.
- Cover Completely: Slowly pour more silica gel over the flowers until they are completely submerged. Be careful not to crush the petals.
- Seal and Wait: Close the container, ensuring it's airtight. Allow 2-7 days for the silica gel to absorb all moisture (thicker flowers take longer).
- Remove and Clean: Carefully remove your preserved blossoms and gently brush away any remaining silica gel with a soft paintbrush.
Benefits and Care Tips for Silica Dried Blossoms
- Color Retention: This method preserves the bright hues and full shape of each blossom more effectively than air drying or pressing.
- Reuse Silica Gel: Silica gel can be reused many times. Refresh by baking crystals in the oven according to the manufacturer's instructions.
- Display Safely: Silica-preserved flowers are beautiful in shadow boxes, glass domes, or as part of centerpieces. Keep them out of direct sunlight to prevent fading.
Choosing the Right Flower Preservation Technique
Each preservation method has its pros and cons, and the right choice often depends on your desired outcome and the type of flower you wish to preserve. Here's a comparison to help you decide:
| Method | Best For | Result | Duration | Skill Level |
|---|---|---|---|---|
| Air Drying | Sturdy, multi-petal blooms | Natural, rustic, 3D | 1-3 weeks | Easy |
| Pressing | Flat, delicate flowers & leaves | Flat, artistic, 2D | 1-2 weeks | Easy-Moderate |
| Silica Gel | Thick, colorful, exotic flowers | Vivid, natural, 3D | 2-7 days | Moderate |
Helpful Tips for Any Flower Preservation
- Begin with the freshest flowers possible for vibrant, long-lasting preserved blooms.
- Handle blossoms gently, as petals can bruise or break easily during the preservation process.
- Keep preserved flowers away from moisture, direct sunlight, or heat sources to prevent fading, mold, or premature decay.
- Mist floral arrangements with a light coat of hairspray for extra durability and color retention.
- Experiment! Combine different methods for creative effects. For example, press some petals while air drying whole stems.

Creative Ways to Use and Display Your Preserved Blossoms
Preserving your blossoms is only the beginning. With beautifully dried or pressed flowers, there are endless possibilities for use and display:
- Bouquets and Arrangements: Keep dried flowers in vases for rustic, eternal centerpieces.
- Shadow Boxes: Frame special bouquets or single blooms as cherished mementos.
- Wall Art: Make creative collages with pressed flowers on canvas or paper.
- Home Decor: Fill glass jars with mixed dried flowers for a boho or cottagecore vibe.
- Resin Crafts: Encapsulate your blooms in resin to create unique jewelry, coasters, and keepsakes.
- Gift Wrapping: Attach pressed petals to gift packages for a personalized touch.
- Stationery: Decorate notebooks, journals, or greeting cards.
Conclusion: Preserve Your Blossoms and Capture Nature's Magic
Preserving your blossoms is a delightful way to record memories, reduce waste, and fill your home with everlasting natural beauty. Whether you prefer the traditional charm of air drying, the artistic appeal of pressing, or the vibrant realism of silica gel drying, each technique provides a fun and effortless approach to extending the life of your favorite flowers.
Start today with one of these effortless flower preservation techniques and let your bouquets, garden treasures, or wildflower finds bring joy for seasons to come. With a little care and creativity, anyone can transform fresh blossoms into permanent tokens of nature's wonder.
Which flower preservation method will you try first? Share your results, tips, or favorite blooms in the comments and inspire others to embark on their own flower-saving journey!
Latest Posts
Embrace the Uplifting Magic of Blossoms
Explore Which Flower Symbolizes Your Personal Essence
Uncovering the Deeper Meanings of Your Birth Flower